The pillbox, built.
After weeks of design, soldering, and 3D printing, we developed the prototype. The hardware up close, the companion app in action, and what we've learned.
What it looks like, all together.
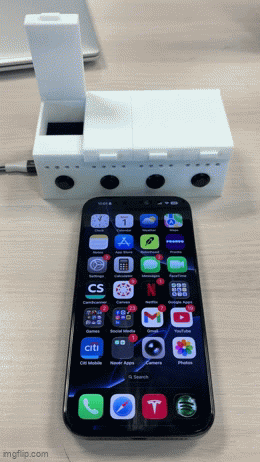
The device, three ways.
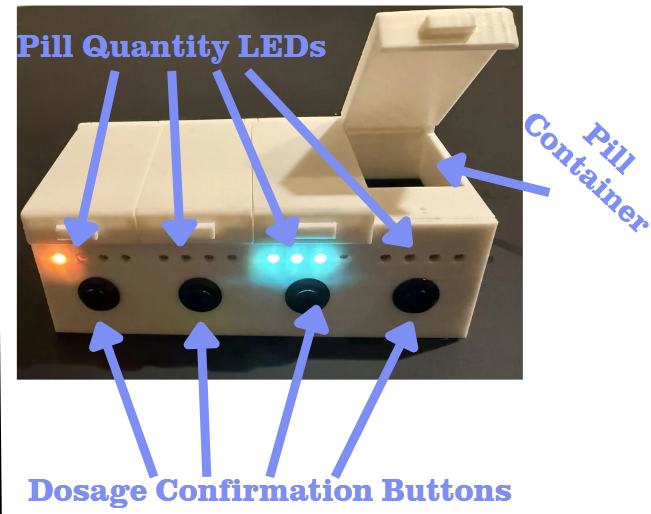
- 4 compartments, each compartment stores one type of pill, one button, and 4 LEDs.
- Quantity of a compartment's lit LEDs indicate the number of pills to take from that compartment.
- Button presses confirm that the dose was taken, LEDs unlight and app provides incentivization rewards.
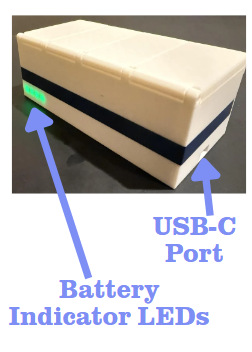
- Quantity of lit LEDs on the back LED strip indicate battery percentage.
- 0 LEDs: Dead, 1 LED: ~25%, 2 LEDs: ~50%, 3 LEDs: ~75%, 4 LEDs: full.
- Battery LEDs only light when IMU detects lifting motion, recharging completed through USB-C Port.
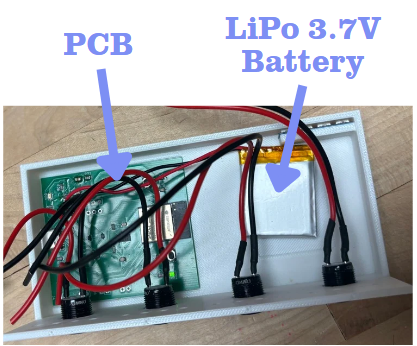
- PCB and battery glued to bottom of pillbox.
- Pill compartments attached on top with a gap for wiring.
- All wiring for battery, LEDs, and buttons occurs within gap (tricky).
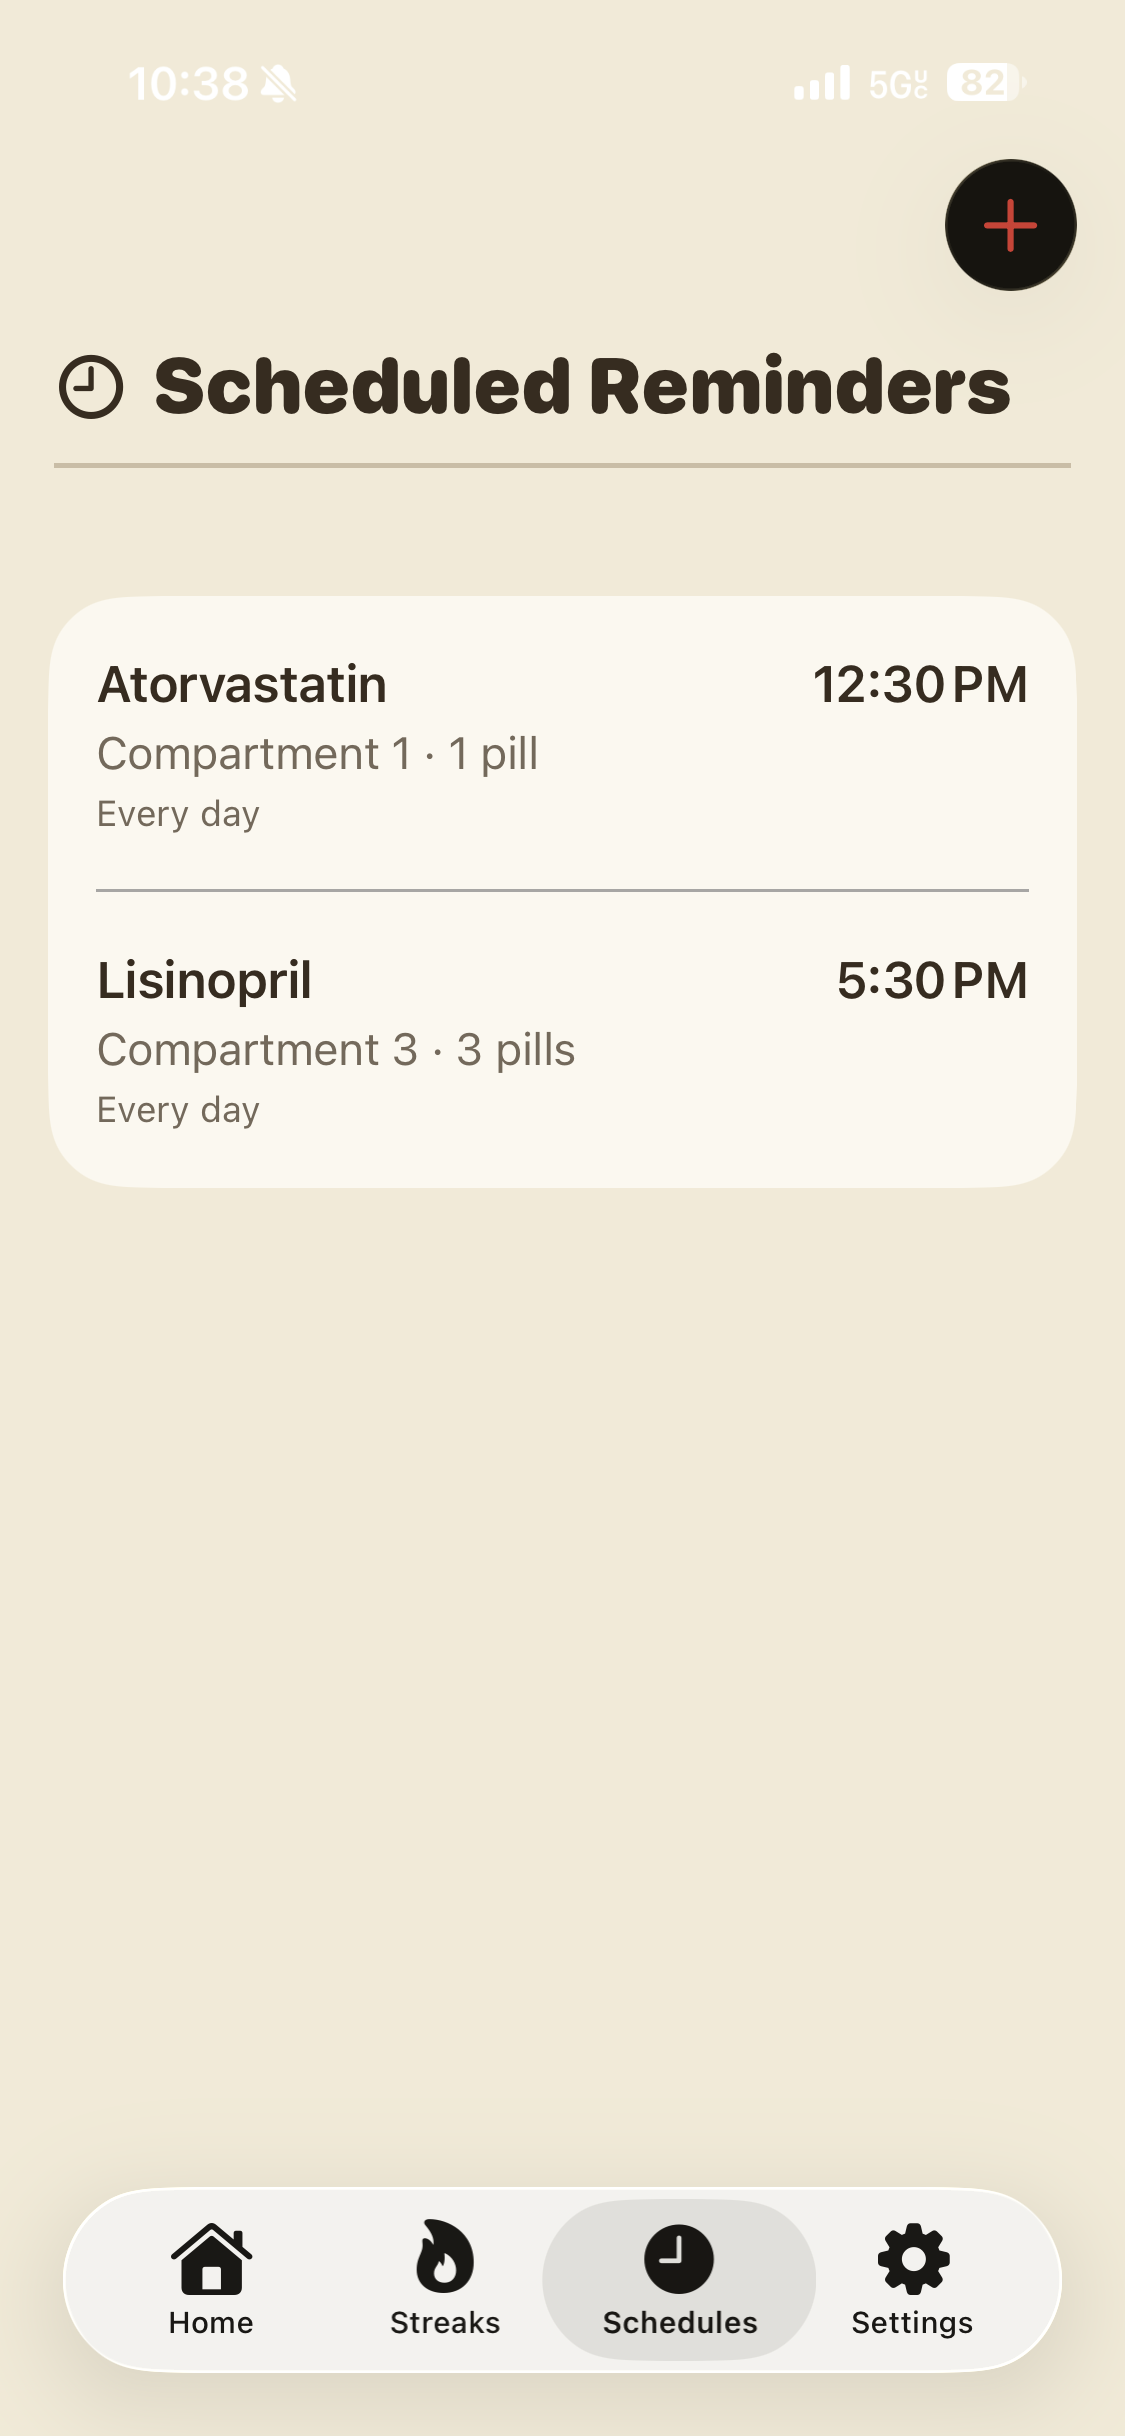
The app, in action.
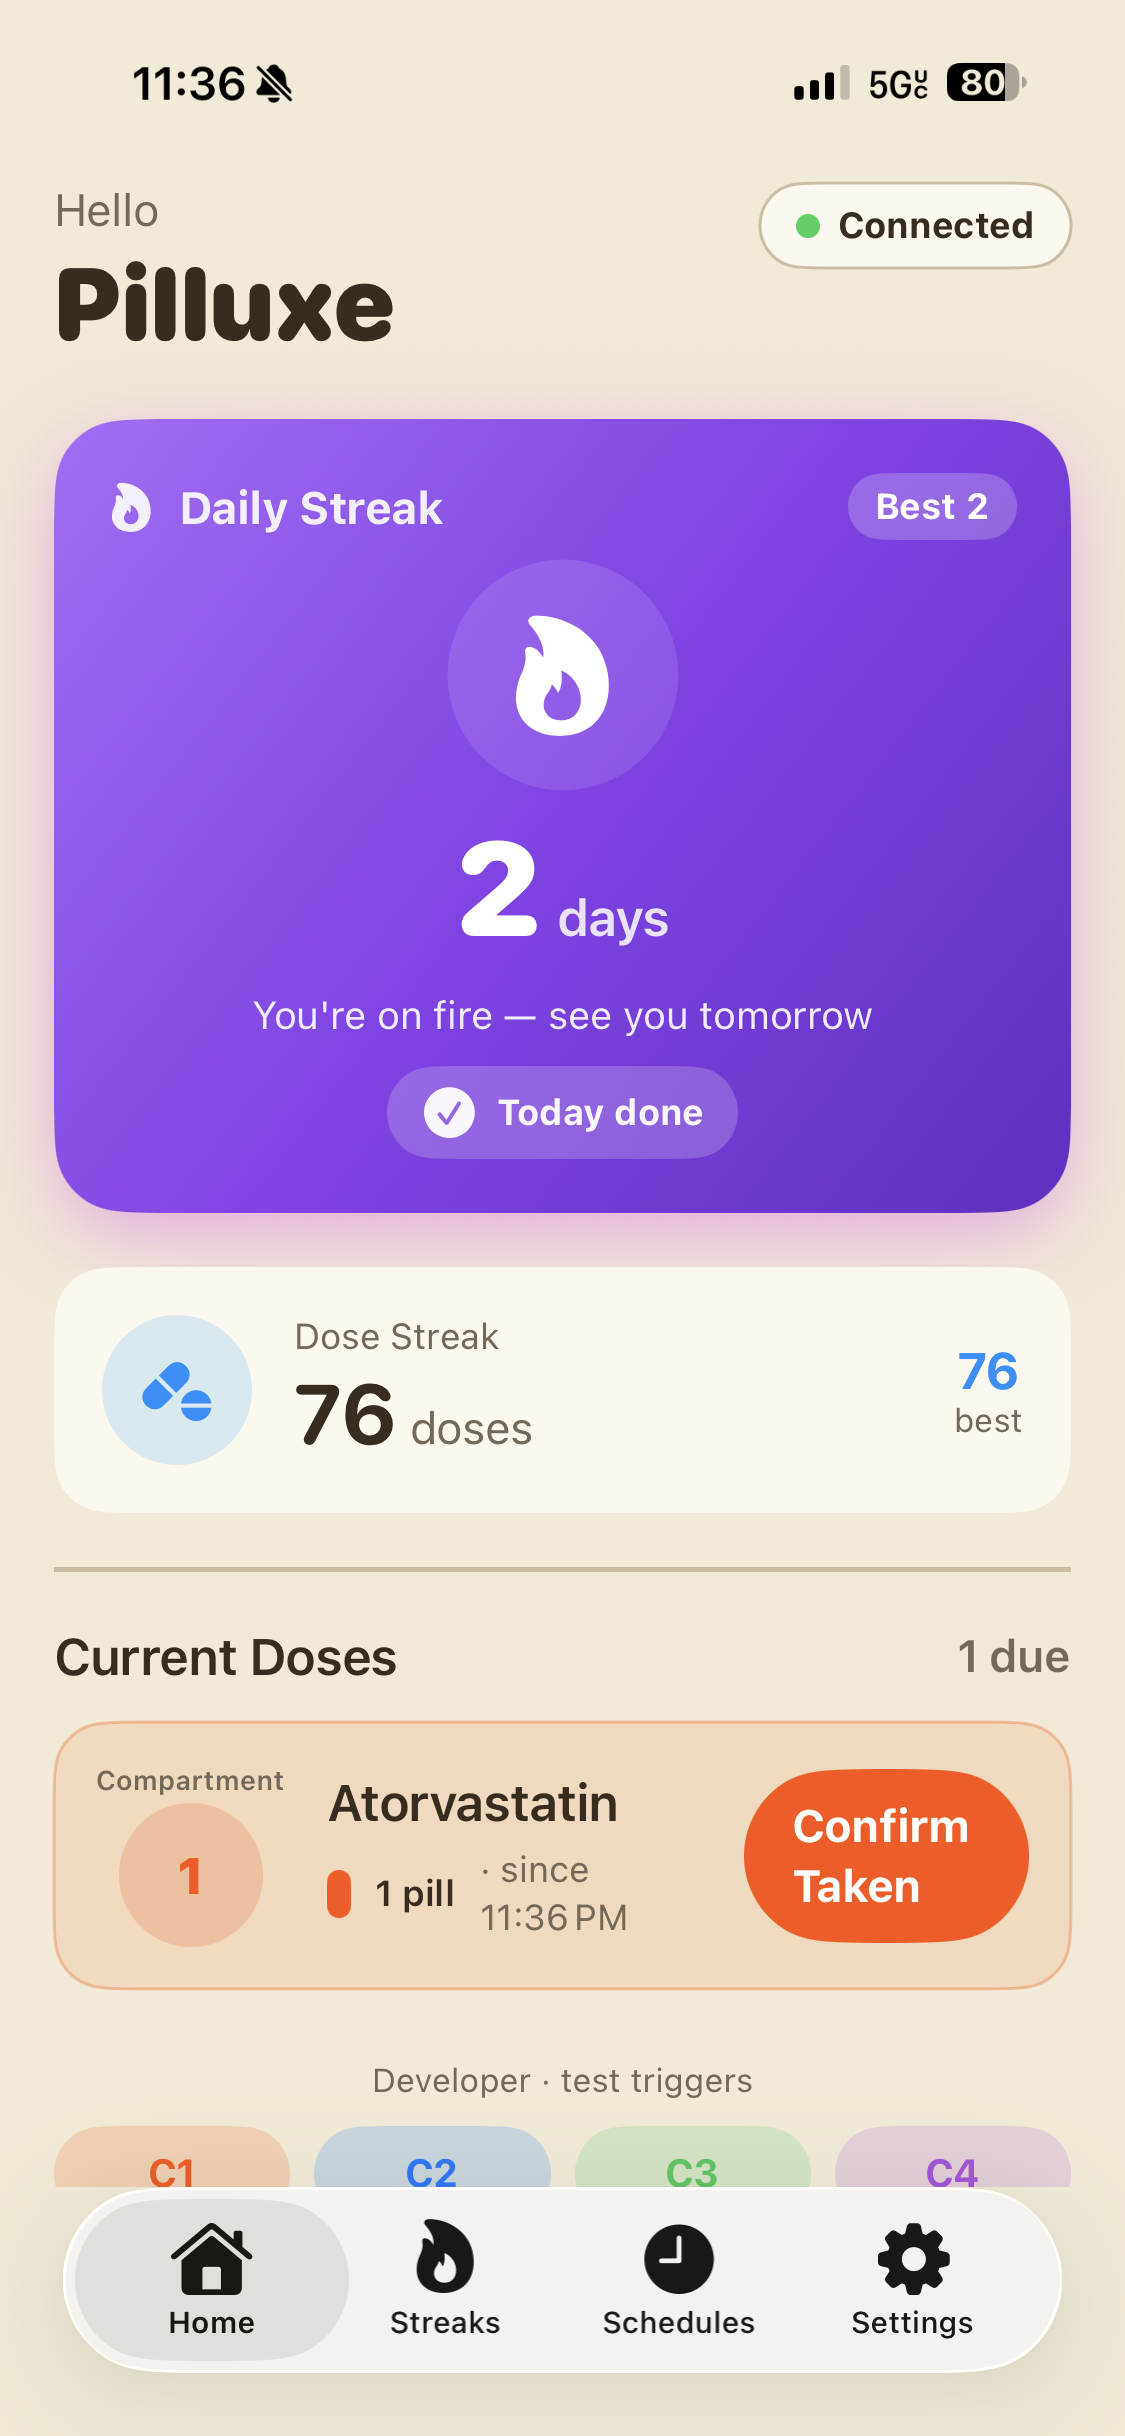
- Daily/dosage streaks immediately update with button press, incentivizing adherence.
- Reminders are easy to follow and correlate with lit LEDs.
- Compartment names are customizable with pill types.
- Schedules are customizable and created with just a few button presses.
- Schedules automatically repeat for selected days.
- Deleting schedules requires only sliding right on the schedule.
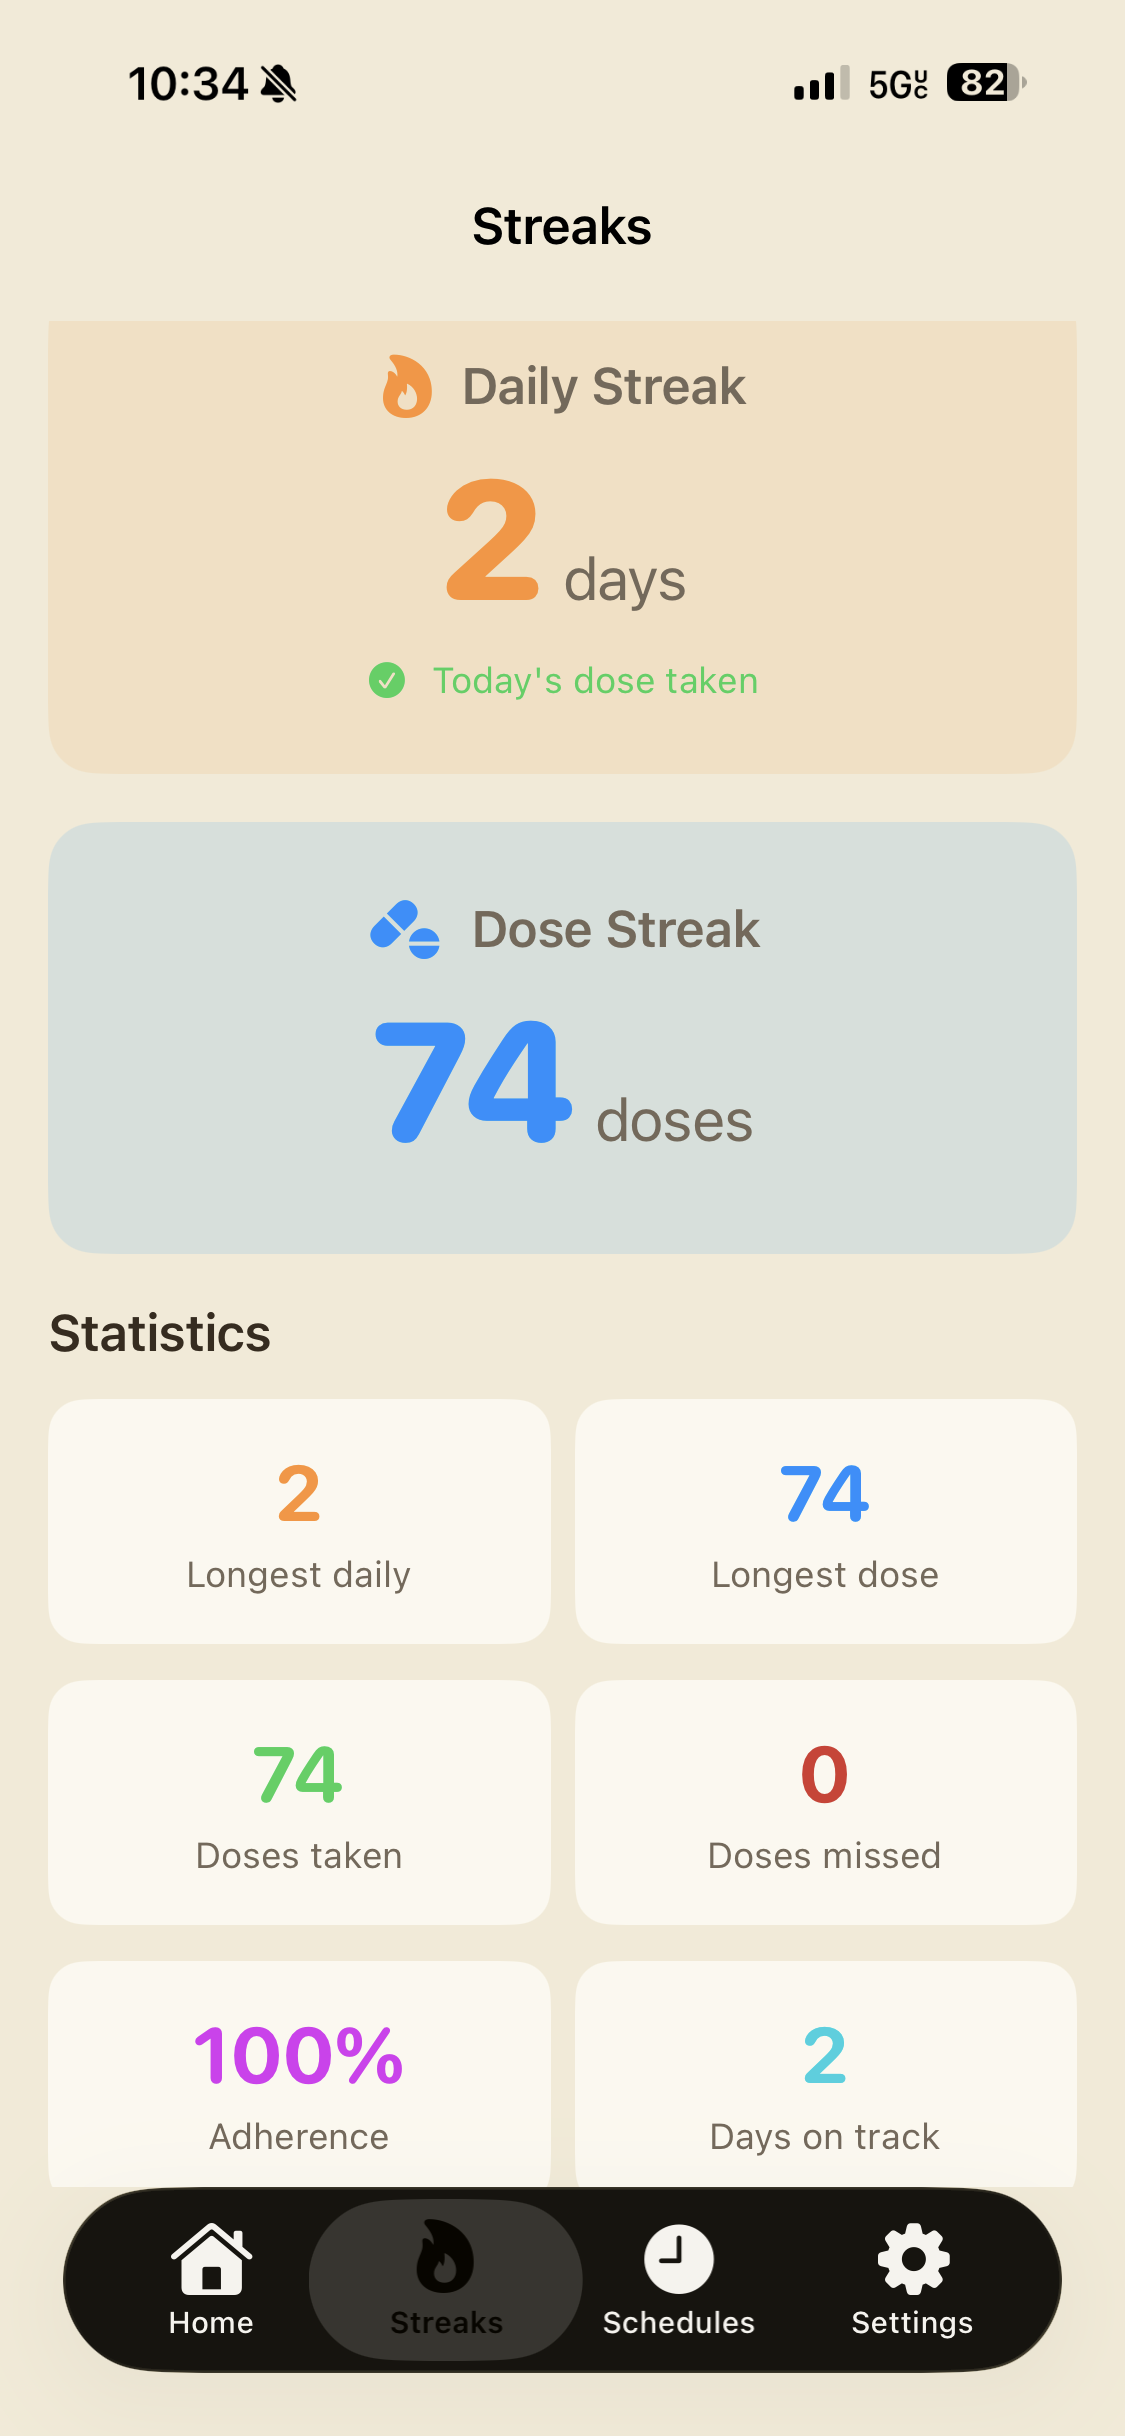
- Best streaks are saved, allowing users to make progress permanent.
- Missed doses and adherence rate convey important medical information.
- Third detail about this screen.
Our Results.
Team members tested the project on their own medication routines and reported higher adherence and less tedium. (Though with a small sample size)
The combination of streaks, statistics, reminders, and the satisfaction of pressing a button that does something replaced the tedium with fun
Sources.
-
World Health Organization. (2003). Adherence to long-term therapies: Evidence for action. World Health Organization. apps.who.int/iris/handle/10665/42682How we used it
The data we reviewed from the World Health Organization's report on medication adherence is what made us feel like this was a worthile problem to solve in the first place. It informed us of the high-prevalence of medication non-adherence among young adults, and we designed our solution around that.
-
Apple Inc. (n.d.). SwiftUI. Apple Developer Documentation. developer.apple.com/documentation/swiftuiHow we used it
The SwiftUI docs were instrumental in the construction of our app, as this was our first time coding in swift or building an app at all. We highly recommend anyone else wanting to learn how to use SwiftUI to build an app to start here.
-
Onshape. (n.d.). Introduction to CAD. Onshape Learning Center. learn.onshape.com/learning-paths/intro-to-cadHow we used it
Although our pillbox design was relatively uncomplicated, our inexperience CAD made actually building it fairly challenging. We used Onshape's Introduction to CAD learning path to get up to speed on the basics, like making a functioning lid, and reach a clean final prototype.
-
Clark, L., & Wellish, I. (2019). Analog Devices ADXL343 breakout learning guide. Adafruit Learning System. learn.adafruit.com/adxl343-breakout-learning-guideHow we used it
For implementing motion detection in our prototype, we used the ADXL343 accelerometer and followed Adafruit's learning guide for it. This guide provided us with the necessary information (with example arduino code) to wire the sensor correctly, configure it for our use case, and interpret its data to detect when the pillbox is being lifted.